
Aha! Roadmaps
Connect Clearly AI to Aha! Roadmaps.
Connect Aha! Roadmaps so Clearly AI can read ideas and roadmap features as Project sources, post comments, and receive Aha! activity events for Workflows.
Clearly AI acts as the Aha! user whose API key you configure. For example, if the key was generated by alex@example.com, comments created by Clearly AI appear as Alex.
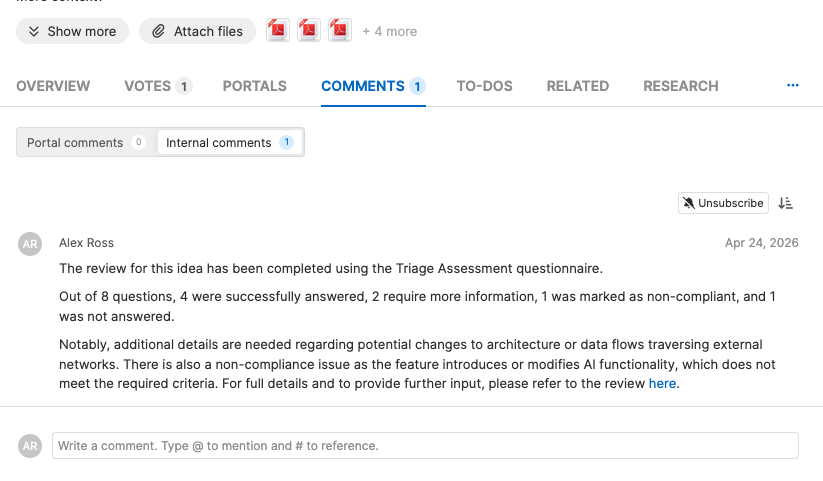
For shared or production use, ask an Aha! administrator to create a dedicated service account, such as Clearly AI bot, and generate the API key from that account. Aha! API keys inherit the permissions of the user that created them, so this keeps Clearly AI activity separate from individual employee accounts.
Create the Aha! API key
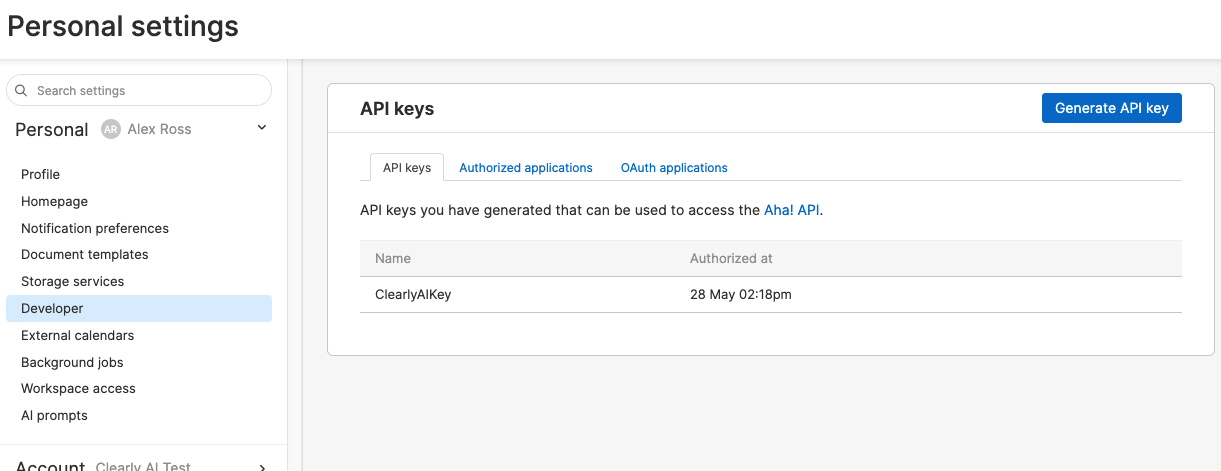
- In Aha!, click your user avatar and open Settings → Personal.
- Select Developer in the left sidebar.
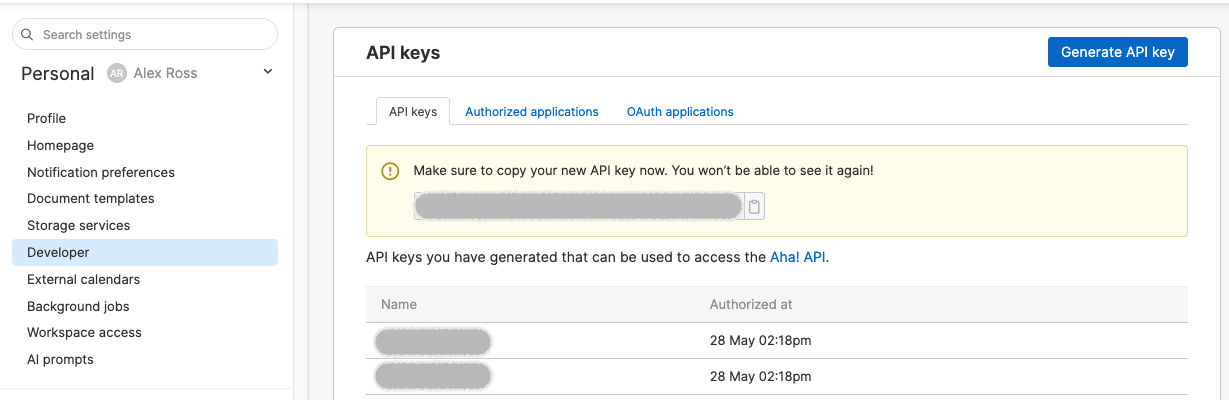
- Click Generate API key.
- Enter a descriptive name, such as
Clearly AI, and click Generate. - Copy the key. Aha! shows it only once.
Connect Aha! in Clearly AI
- In Clearly AI, open Integrations and select Aha!.
- In Account subdomain, enter the hostname before
.aha.io. Forhttps://acme.aha.io, enteracme. - In Personal Key, paste the Aha! API key.
- Save the configuration.
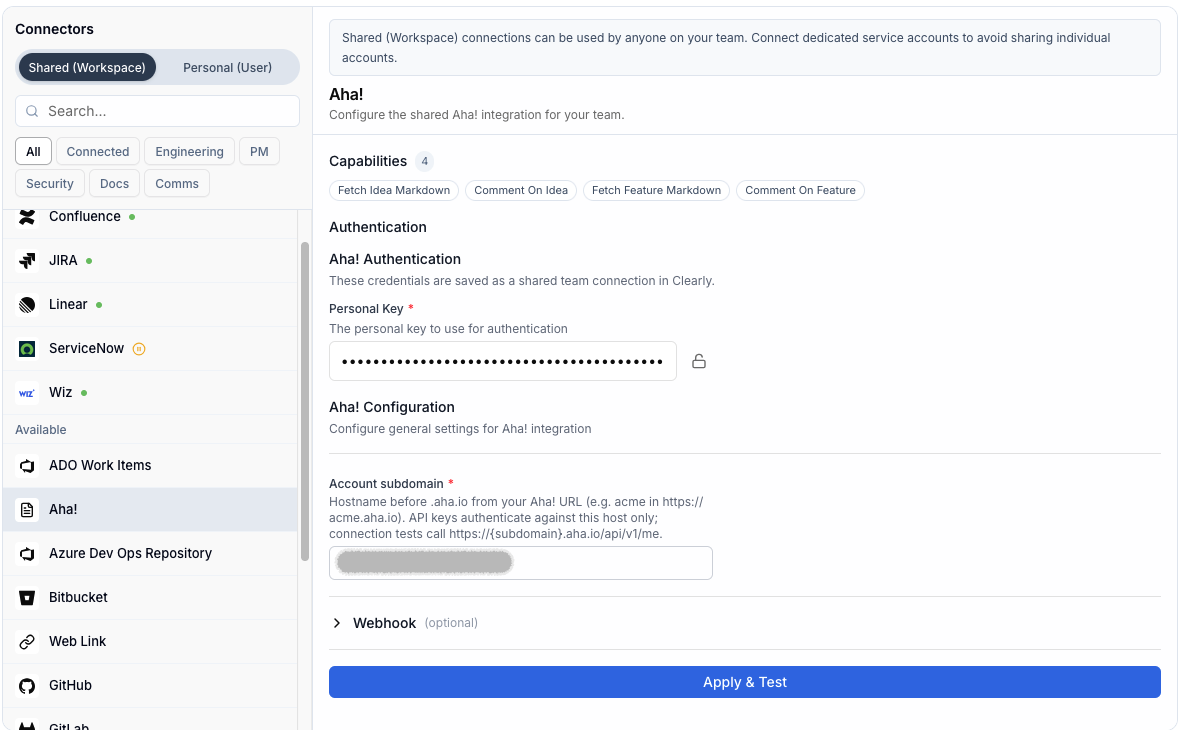
After saving, click Test. A successful test confirms Clearly AI can authenticate against https://{subdomain}.aha.io. If the test fails, the result should identify an invalid subdomain, an inactive key, or an account access problem.
Configure Aha! activity webhooks for Workflows
Configure an activity webhook if you want Aha! events, such as idea or feature changes, to trigger Clearly AI Workflows.
You need Aha! account administrator privileges with customization access to create an account-level activity webhook, or workspace owner access for a single workspace.
Generate the Clearly AI webhook URL
Aha! activity webhooks cannot send custom request headers, so Clearly AI embeds the webhook secret directly in the URL as a whs query parameter. Treat the full webhook URL as a secret.
- In the Clearly AI Aha! integration settings, expand the Webhook section.
- Click Generate secret.
- Click Save.
- Copy the Webhook URL. The displayed URL already includes the secret as
?whs=....
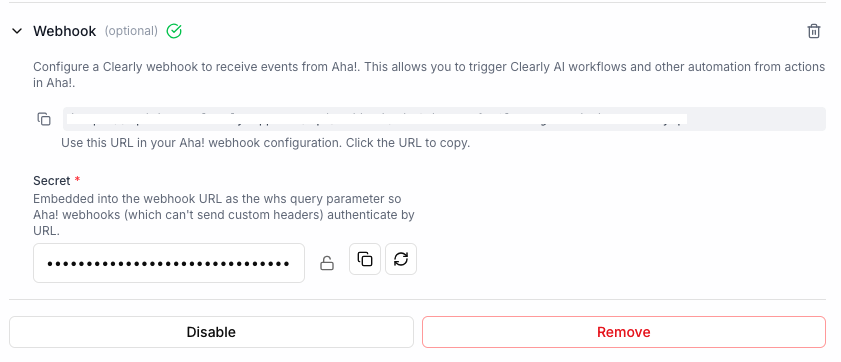
Use the full generated URL from Clearly AI when you configure Aha!. Do not remove the ?whs=... query parameter.
Create the activity webhook in Aha!
In Aha!, open Settings → Account → Integrations for an account-level webhook, or Settings → Workspace → Integrations for a single workspace.
- Select Activity webhook from the list of available integrations.
- In Hook URL, paste the Clearly AI webhook URL, including the
?whs=...portion. - Add the record types that should trigger Workflows:
- Idea for idea events.
- Feature for roadmap feature events.
- Optionally Comment to also receive comments posted on ideas and features.
- Enable Deliver immediately if events should bypass the default five-minute Aha! delay.
- Check Enable and save the integration.
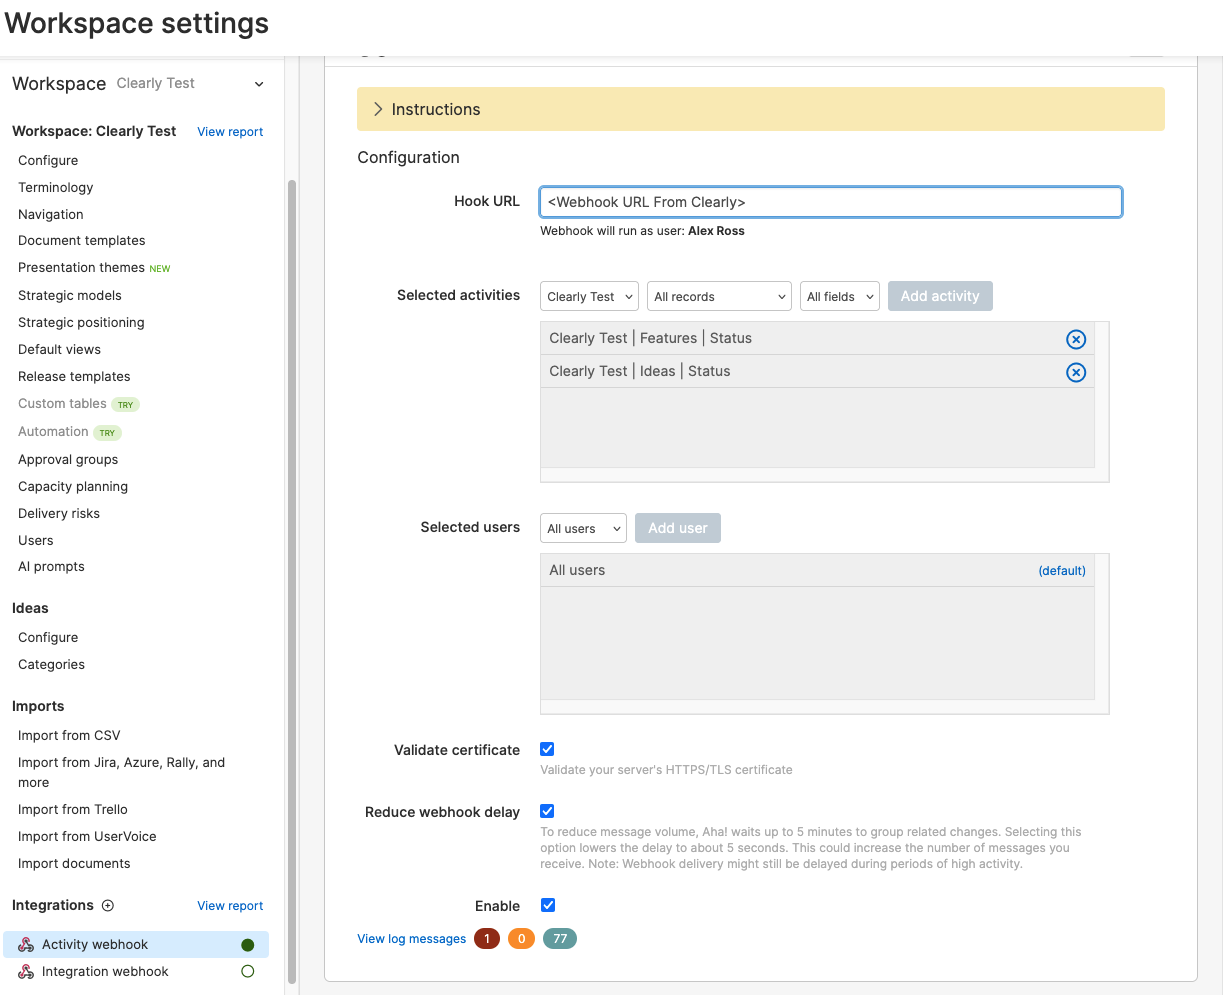
Clearly AI only acts on idea and feature audit events. Other record types are accepted by the endpoint but ignored. To confirm the setup, return to the Aha! integration in Clearly AI and use Validate your request configuration. A correct setup returns 200 OK. After validation succeeds, Aha! activity that matches your selected record types can trigger Clearly AI Workflows.