
Reviews
Create a Clearly AI Project, run a Review, and inspect results.
This guide walks you through the most commonly used path in the Clearly AI web app: creating a project, attaching sources, picking a review template to run, and viewing the resulting review.
What you'll need
- A Clearly AI account (your administrator or invite email is the source of truth for how you sign in).
- Material the product can analyze, known as sources: uploaded documents (such as PDF, Word, or Markdown) and/or a connected source of information through Integrations (such as GitHub, SharePoint, or Jira). See Integrations for setup details and links to each connector.
Time to complete: About five minutes
What you can do in Clearly AI without extra setup
- Run a review using only files and/or repo content you attach to a project, plus a review template your organization provides.
- See each control or question answered with status, analysis, and citations when the review template is built that way.
- Export the review in common report formats.
- Regenerate to run the same review again after you change sources or want a fresh pass.
These usually take more configuration and are optional for a first review:
- Triggering reviews automatically from Jira, GitHub, or other tools (Workflows)
- Sending results to Slack (Slack)
- Creating Jira tickets from findings (Jira)
- Custom export formats with full field control (Exports)
How projects, sources, and reviews fit together
- A project holds your sources (files and integrations) and your reviews.
- You add sources to the project, not inside the small new-review dialog.
- Until at least one source is present, the overview prompts you to Add sources to this project and New Review stays unavailable (hover the button to see Add sources to the project before adding reviews). After you add a source, you can start a review while sources are still processing.
Two ways to get started
- From Projects — Open Projects, choose New Project, fill in the form, then add sources on the project and click New Review. The steps below follow this path.
- Guided setup — If your org exposes a full “create project” wizard, you may see Project Details, then Add Sources, then Submission where you pick a review template and use Submit Project to create the review and start it in one go.
Step 1: Create a project
From Projects, create a new project with a clear name and a short description of the system, feature, vendor, or application being reviewed. The description should explain the purpose and scope well enough for another reviewer to understand what belongs in the review.
The Projects page lists existing work and surfaces New Project as a card at the top of the list (Figure 1). The New Project modal collects the name and description before Create (Figure 2).
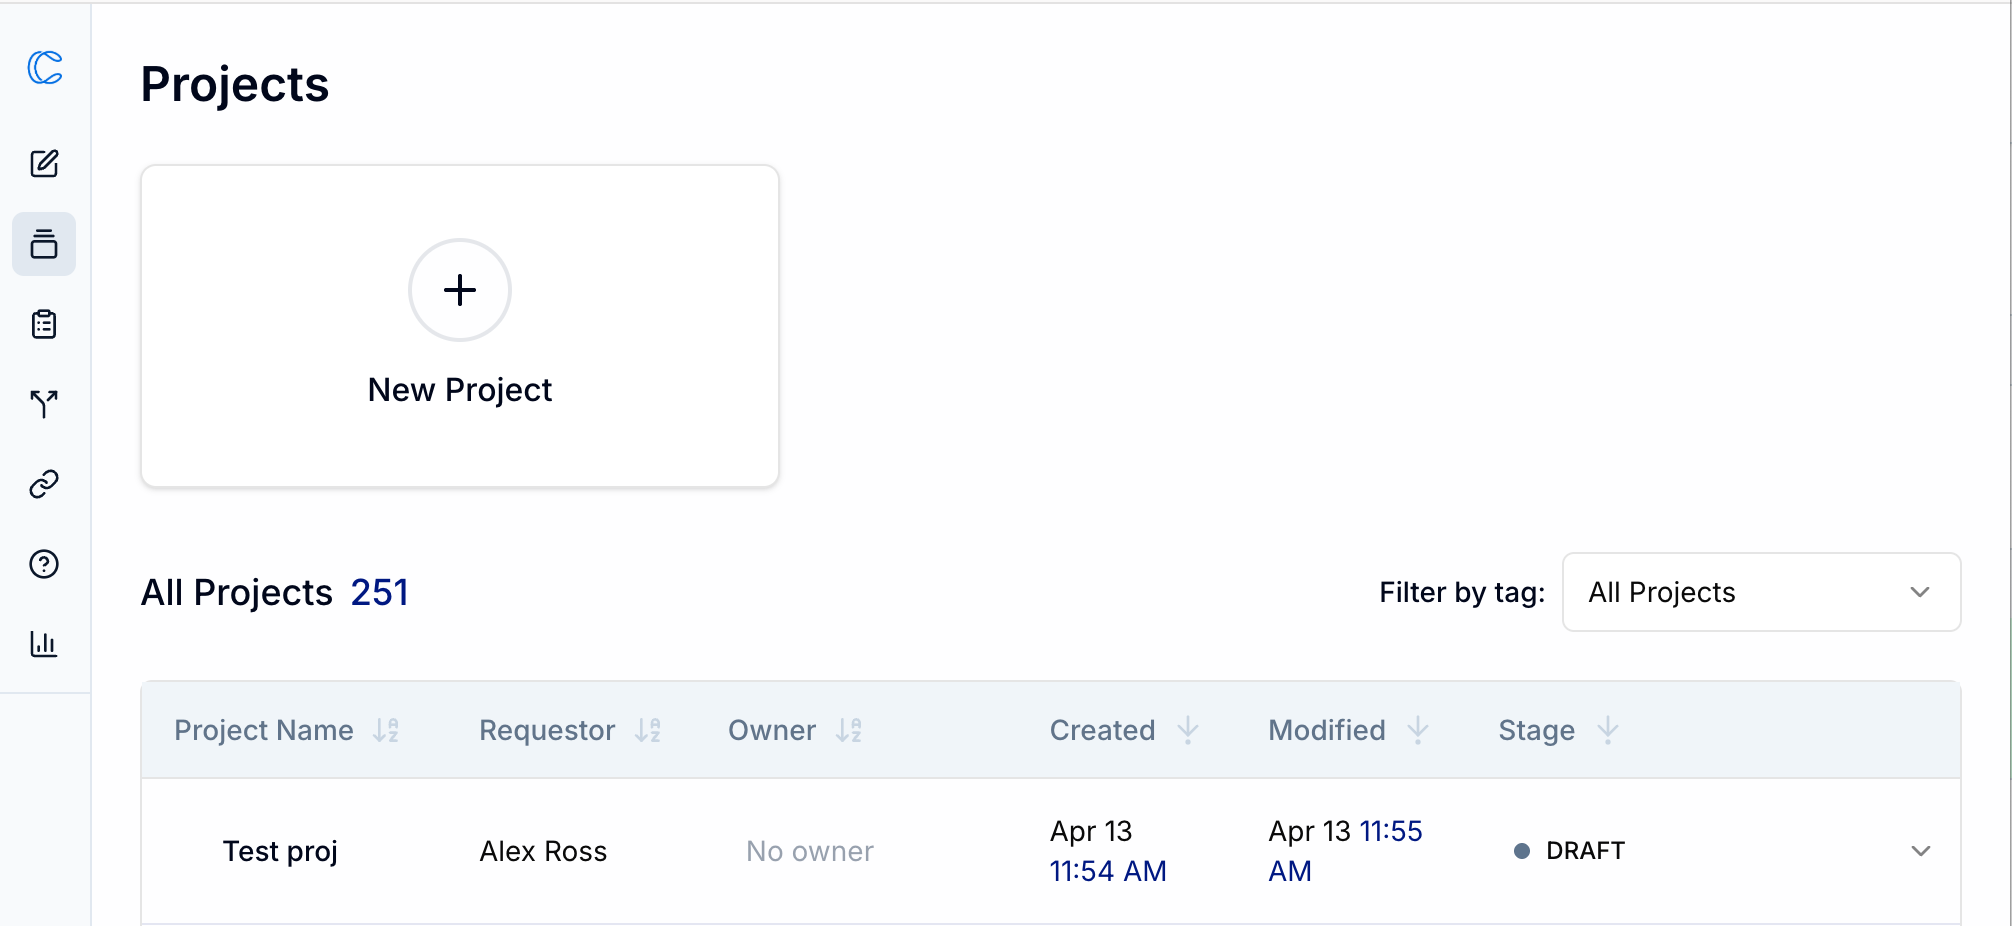
Figure 1. Projects list with the New Project card used to start a new workspace.
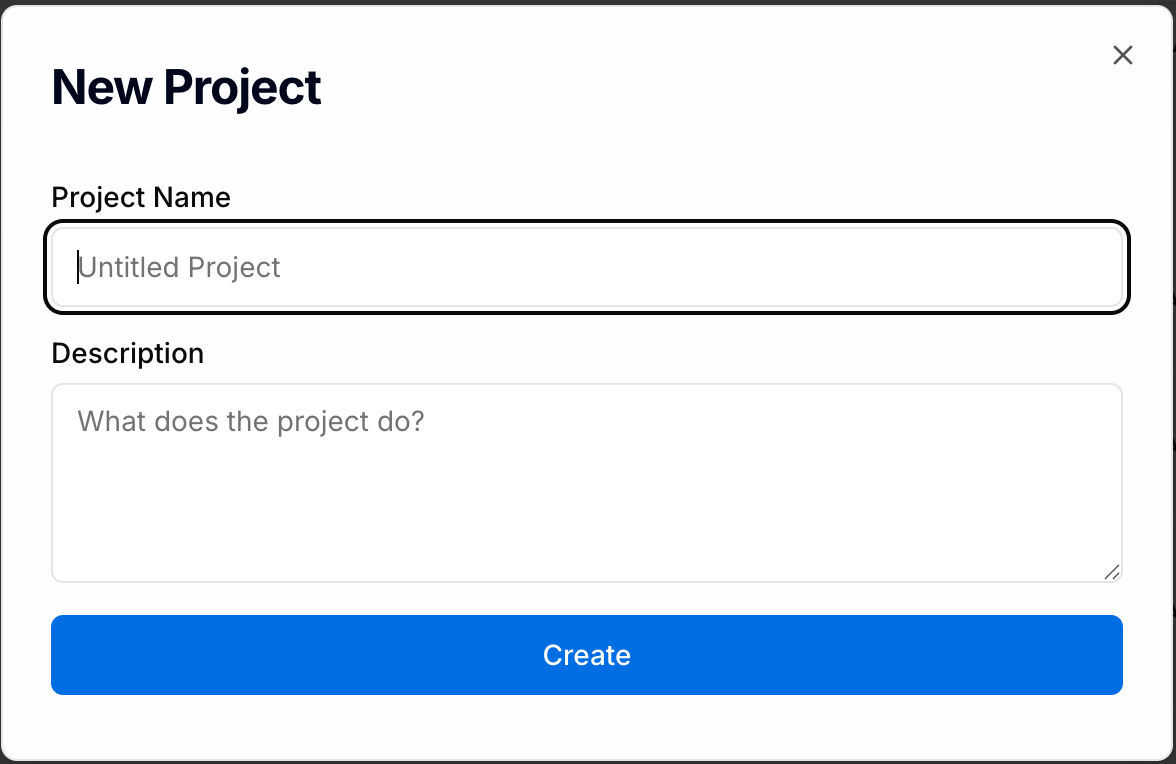
Figure 2. New Project modal: Project Name, optional Description, and Create.
Step 2: Add sources
Open Manage Sources (or the sources area for this project). The Manage Sources window (Figure 3) is where the text box, Upload Files, Search Integrations, and category panels live.
You will see several options in the UI:
- Text Box - This can be used to add Snippets (free text instructions) directly, or add URLs to crawl. If URLs are recognized, an Add All button will appear, otherwise a Save as Snippet button will appear. Figure 4 shows saving plain text as a snippet; Figure 5 shows recognized URLs in the same box.
- Upload Files — Drag in files or browse to attach them (see the upload control in Figure 3).
- Integrations — Connect GitHub, GitLab, or Bitbucket and choose the repository and branch you want included. Figure 6 shows the GitHub flow from Search Integrations.
The UI allows you to organize sources into Categories as a way of adding additional context for the LLM, and keeping sources visually organized for other users. Clearly AI keeps a default category available for uncategorized sources, and you can Add Category to create your own categories, as in Figure 7.
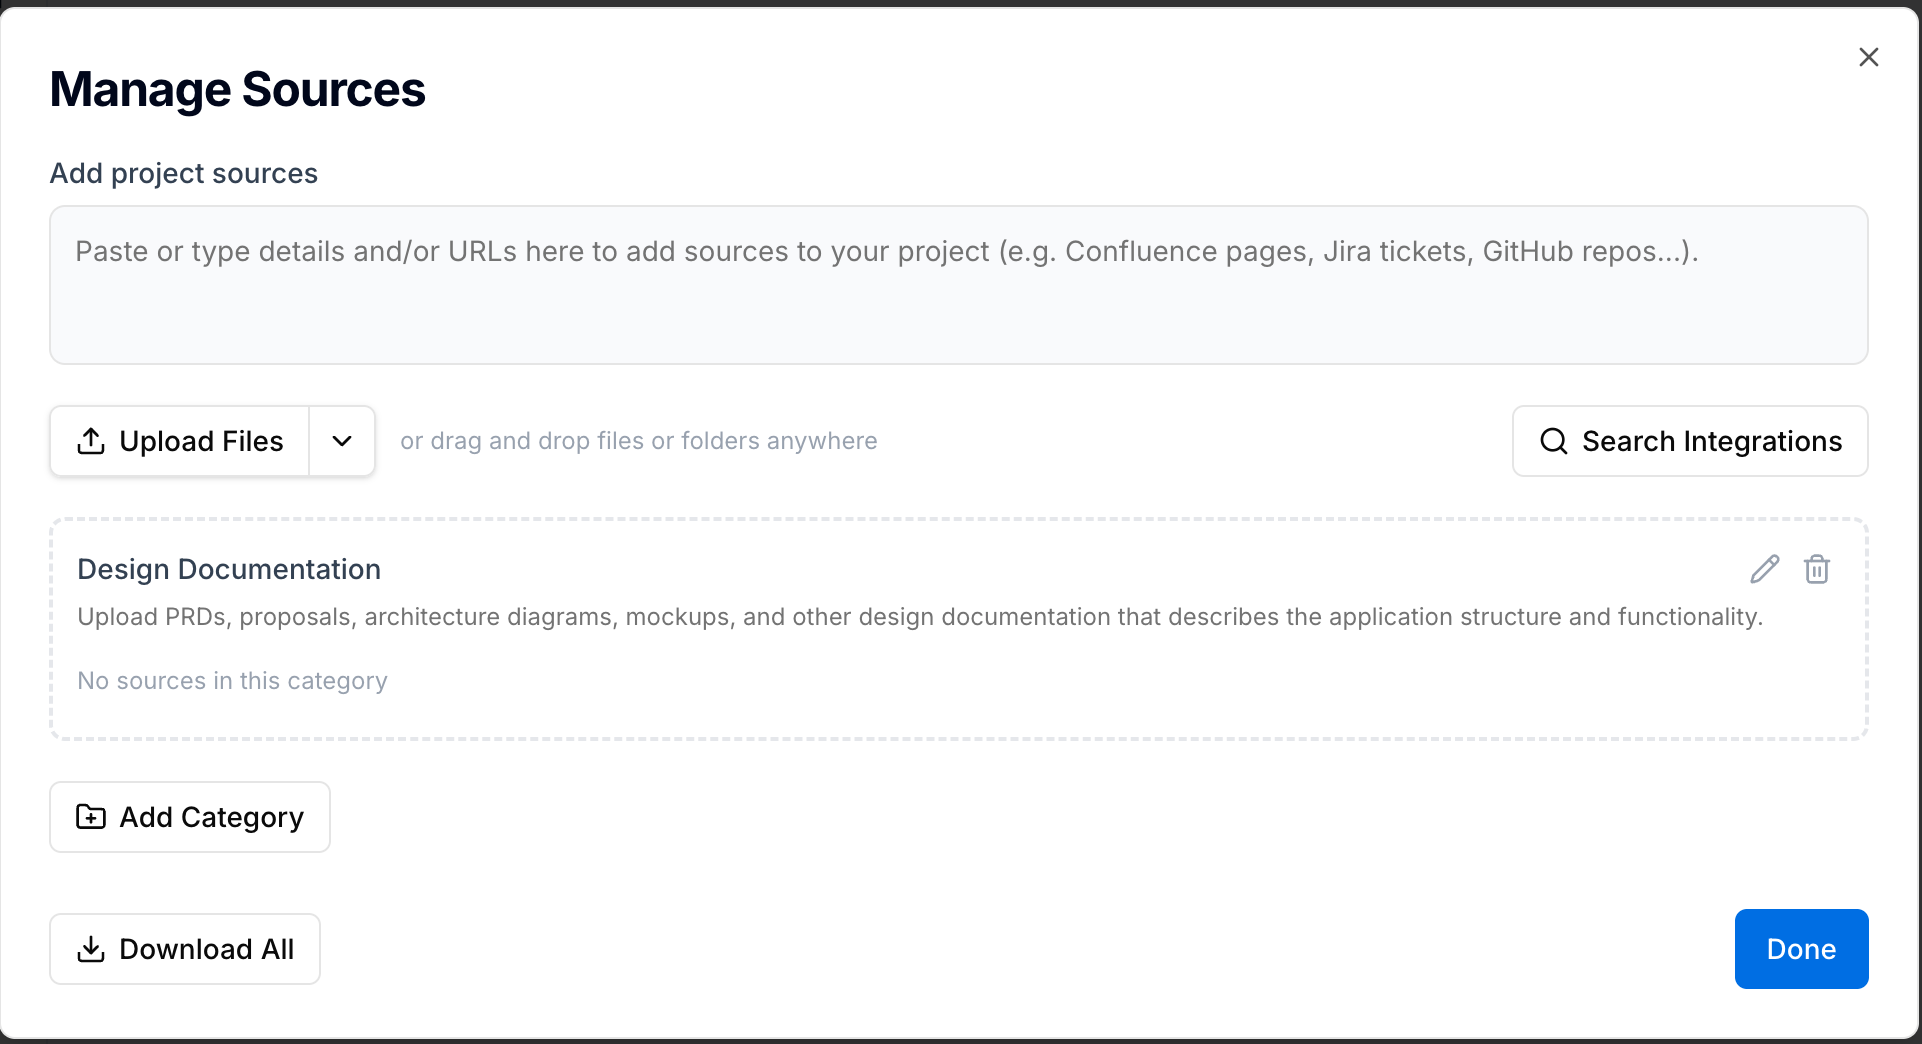
Figure 3. Manage Sources: add text or URLs, upload files, search integrations, and manage categories.
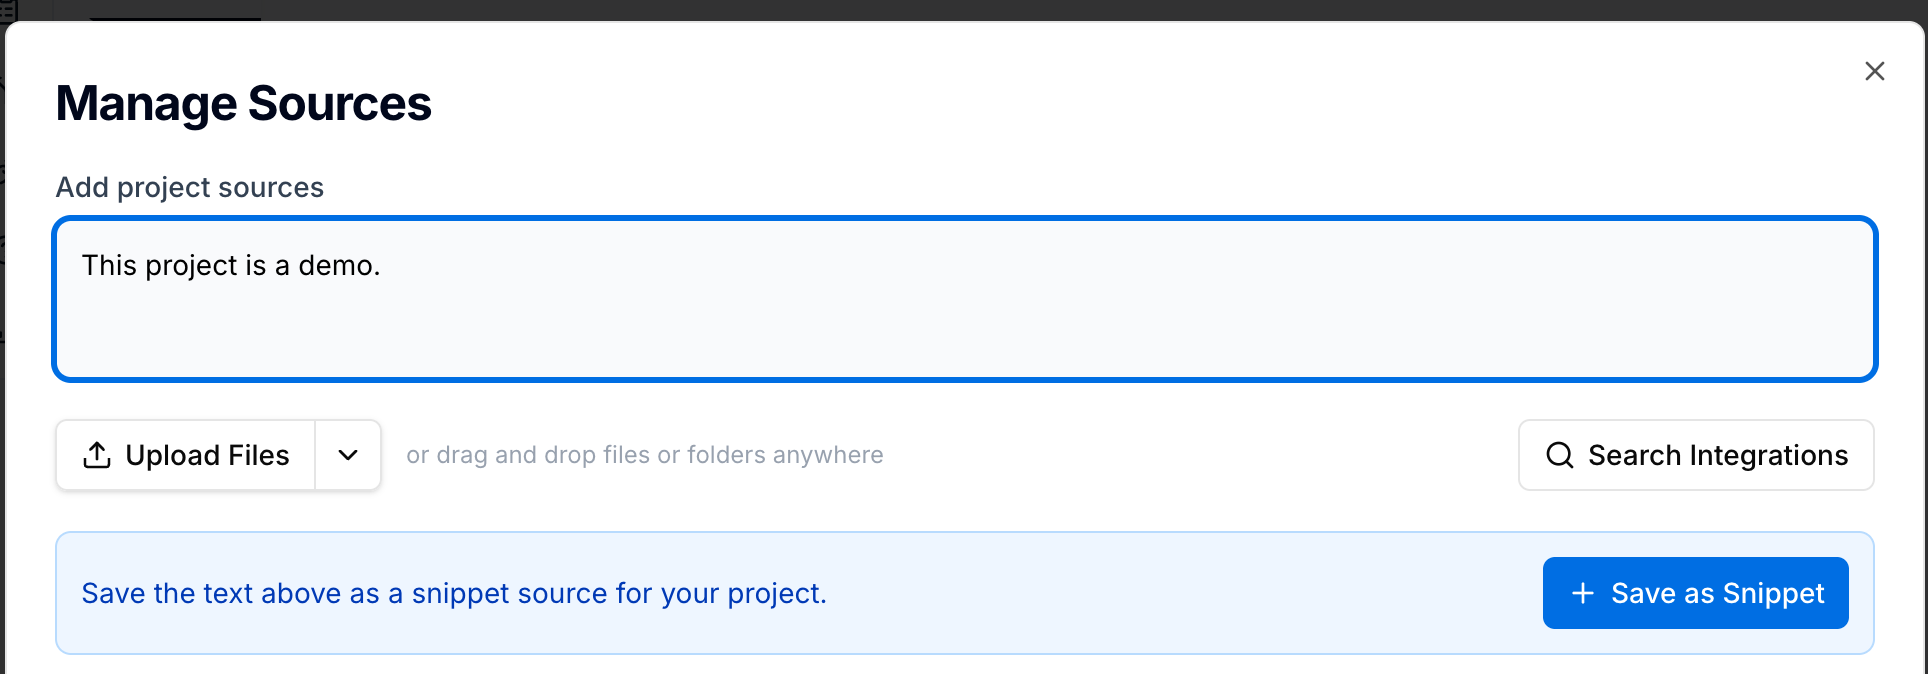
Figure 4. Save as Snippet when the text box does not parse as URLs.
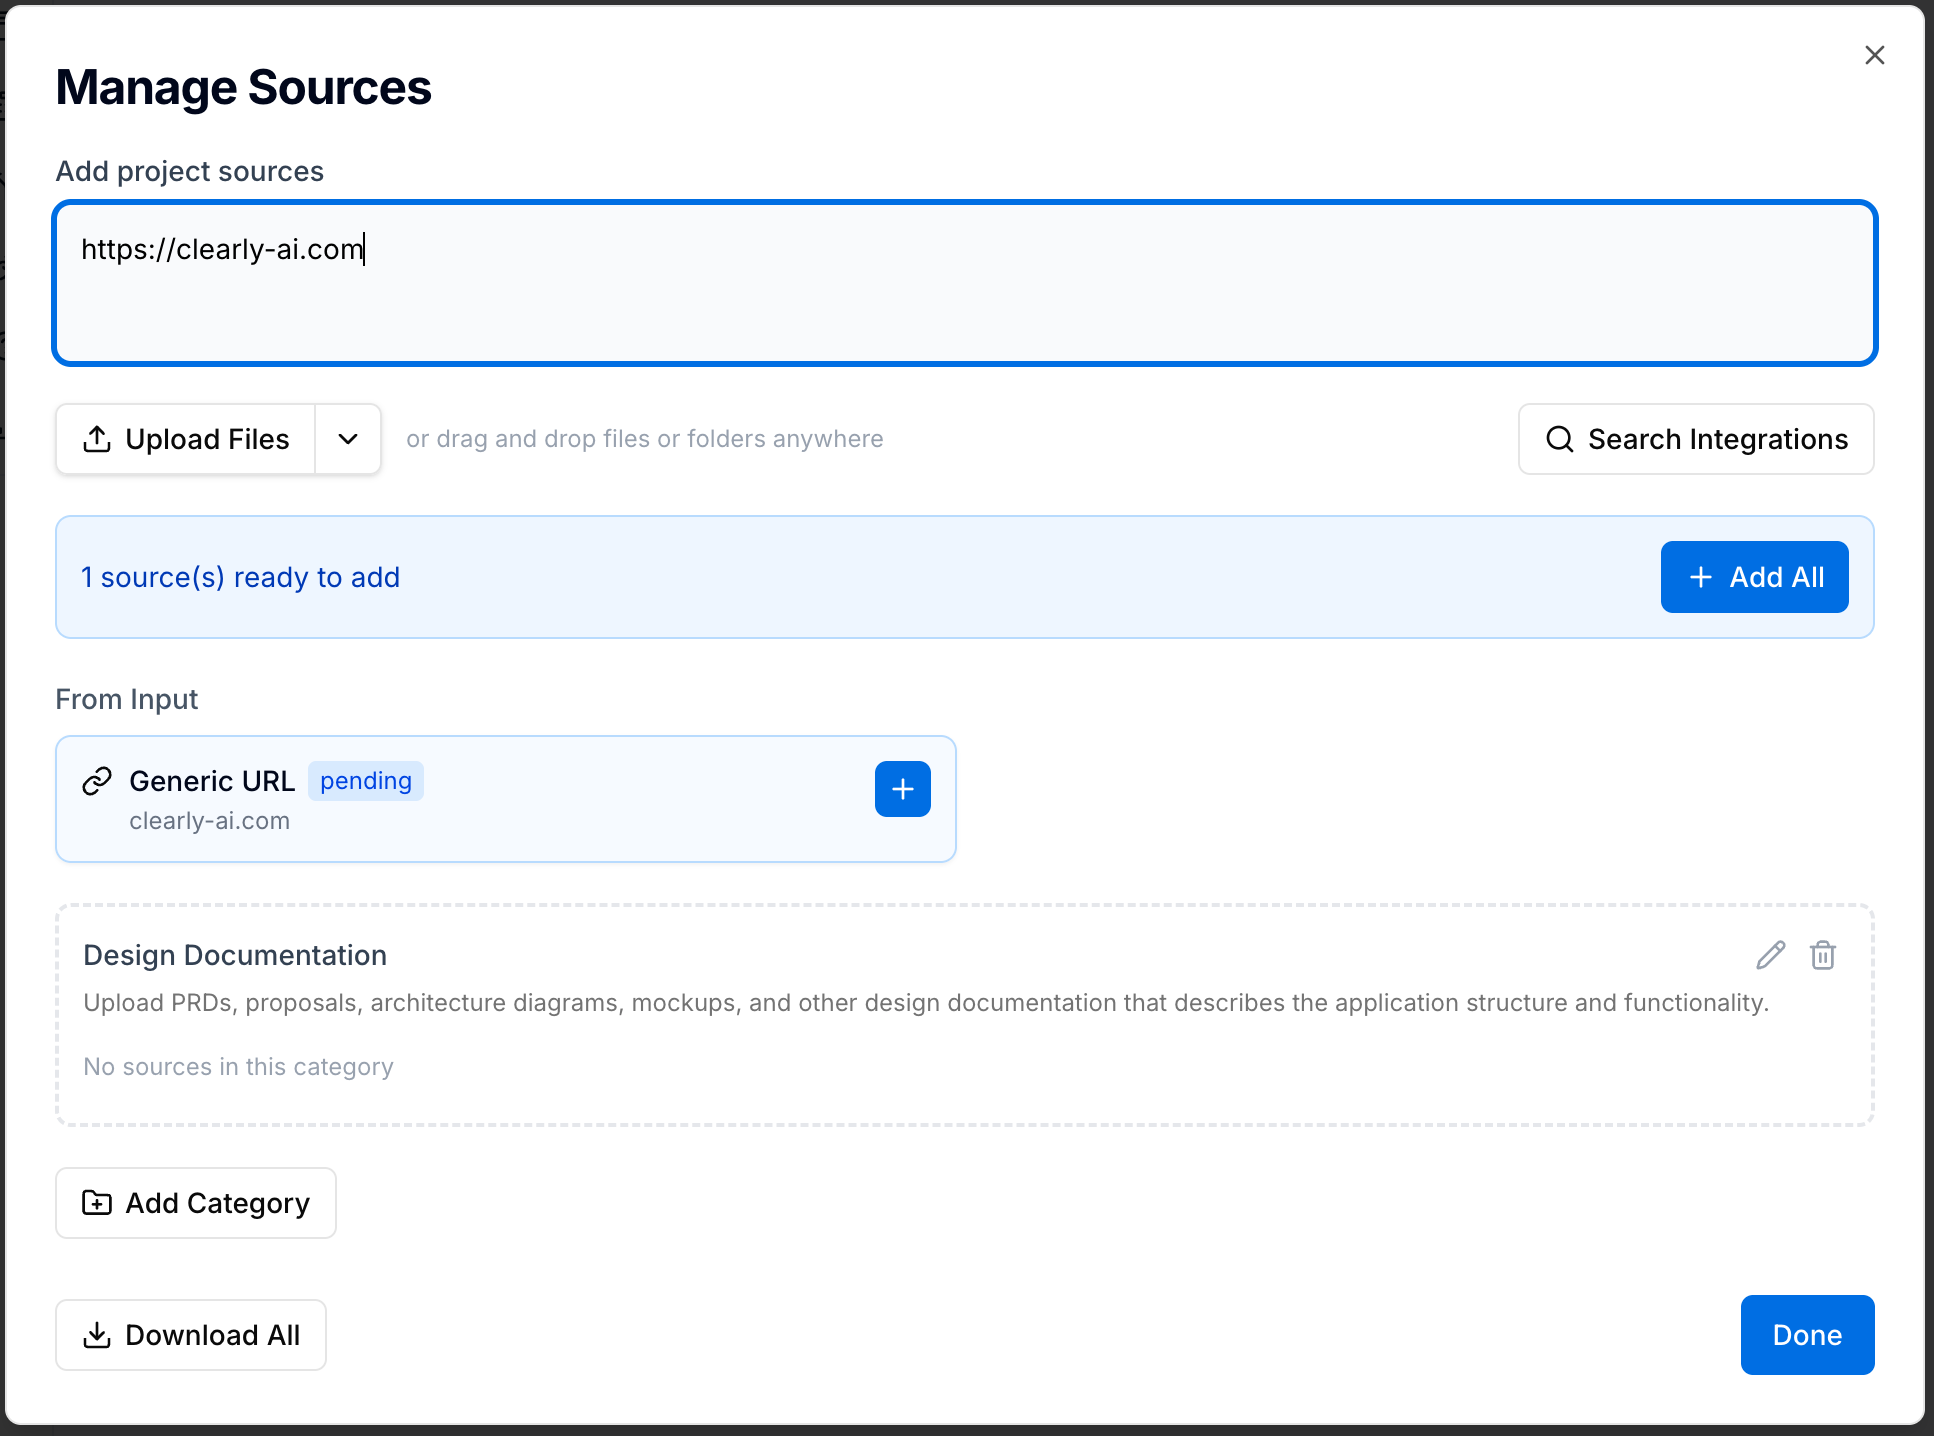
Figure 5. URLs in the text box with Add All to pull them in as sources.
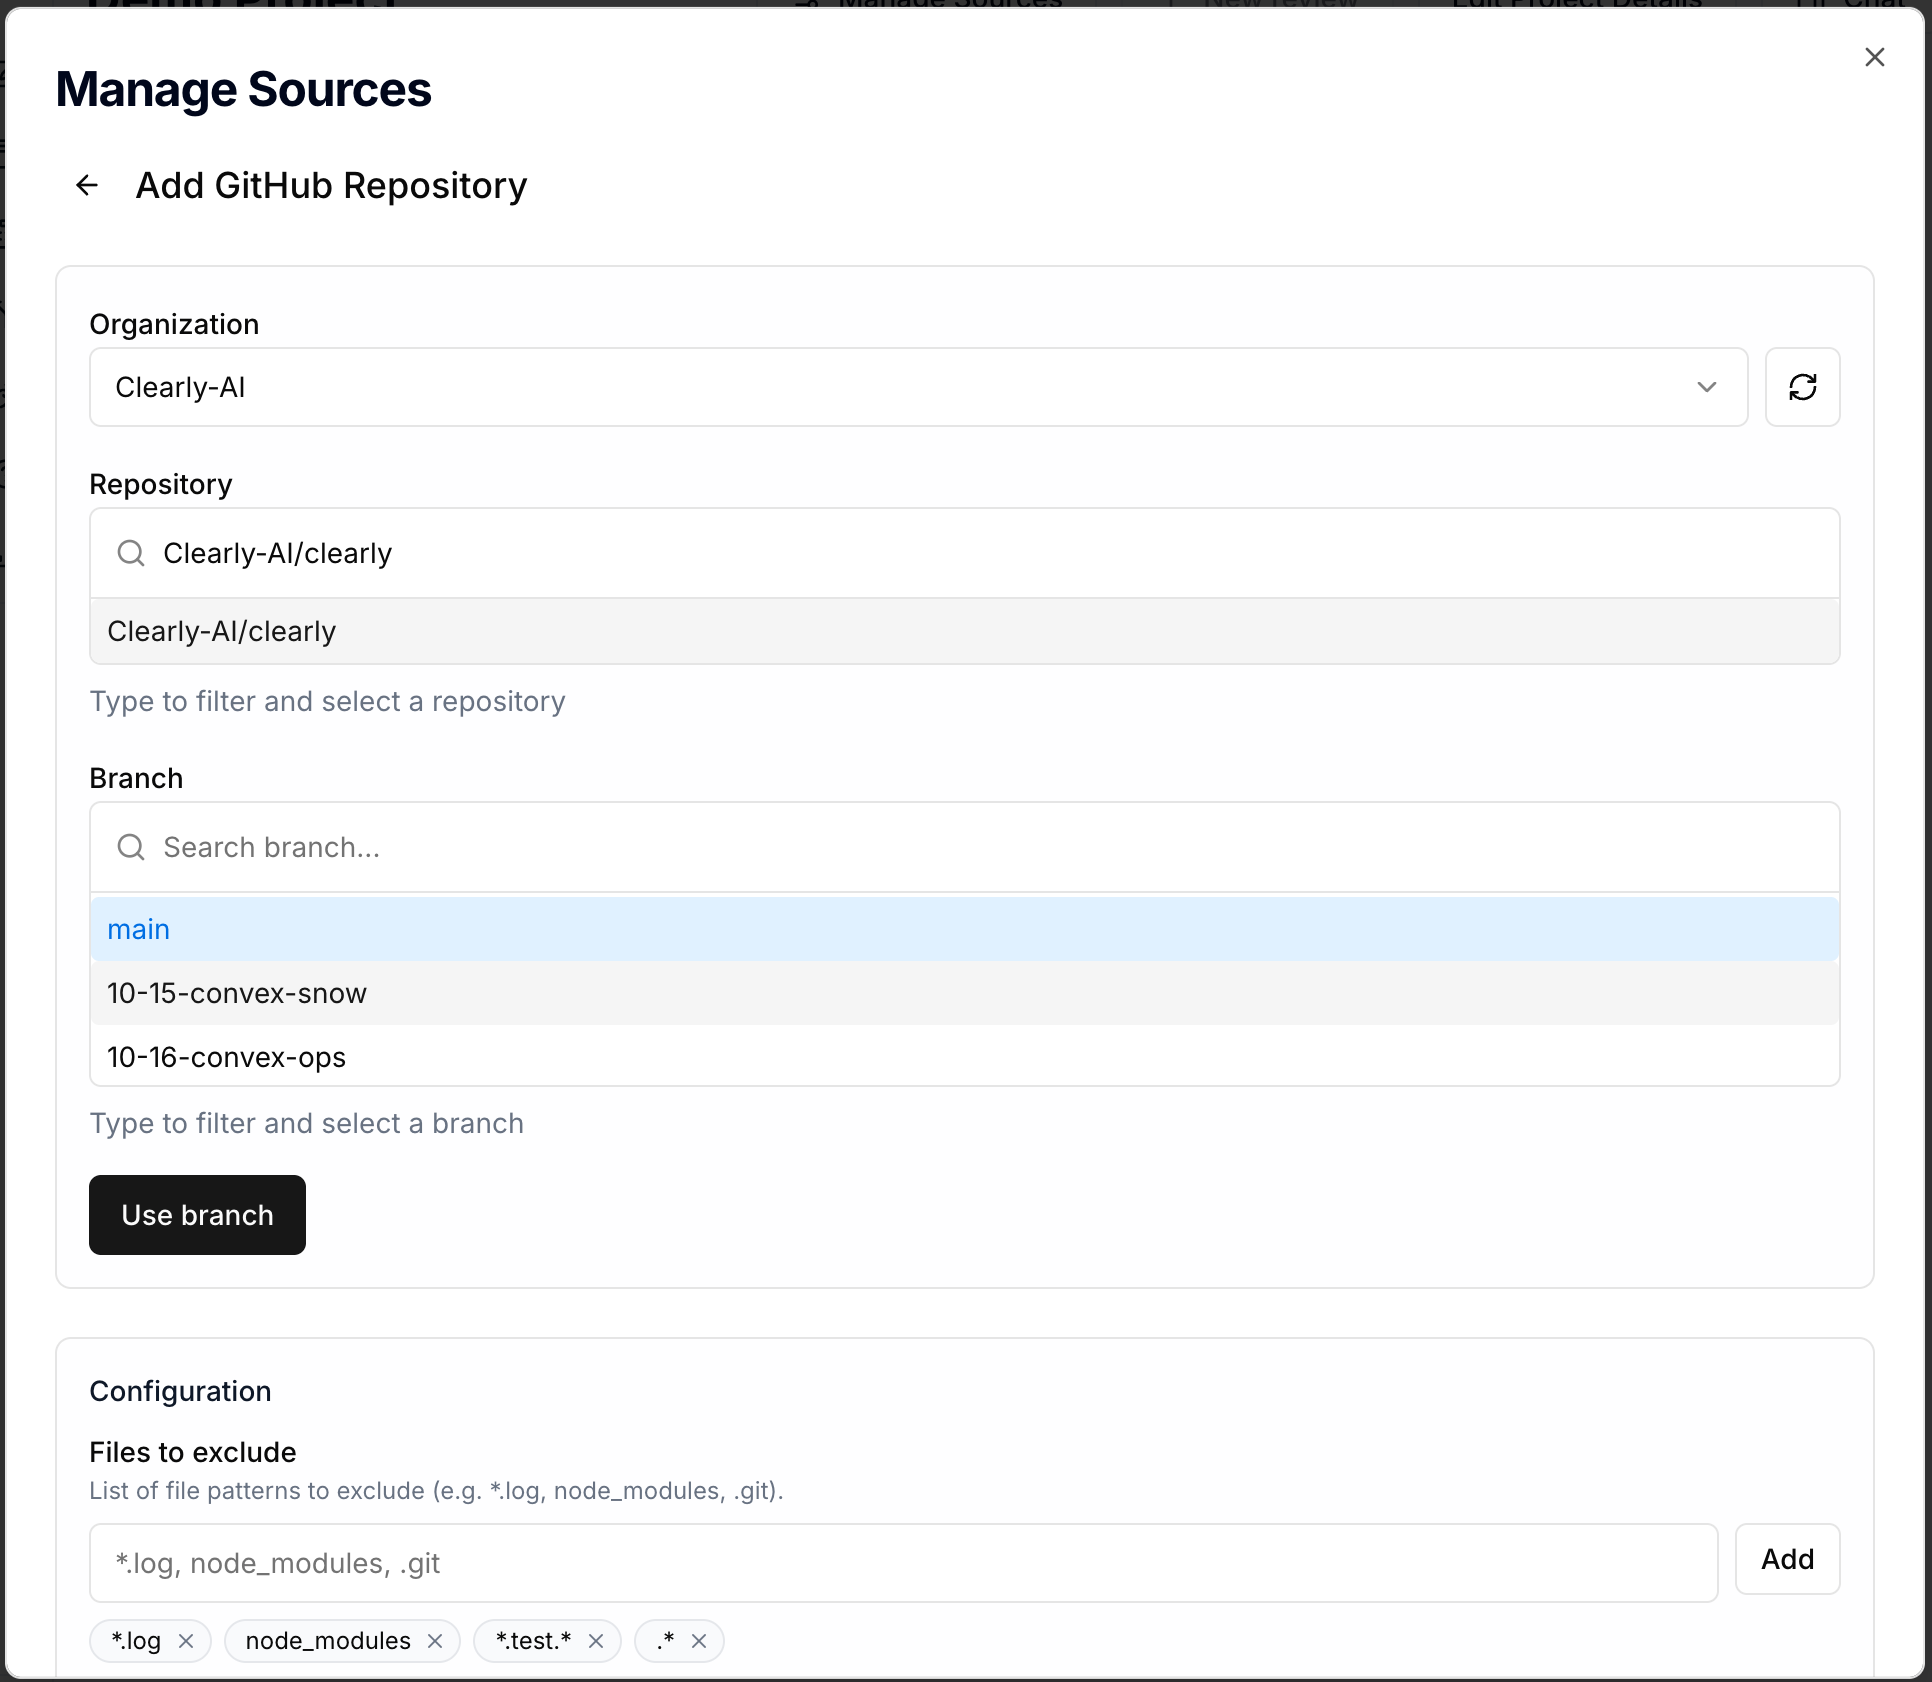
Figure 6. Picking a GitHub repository and branch after Search Integrations.
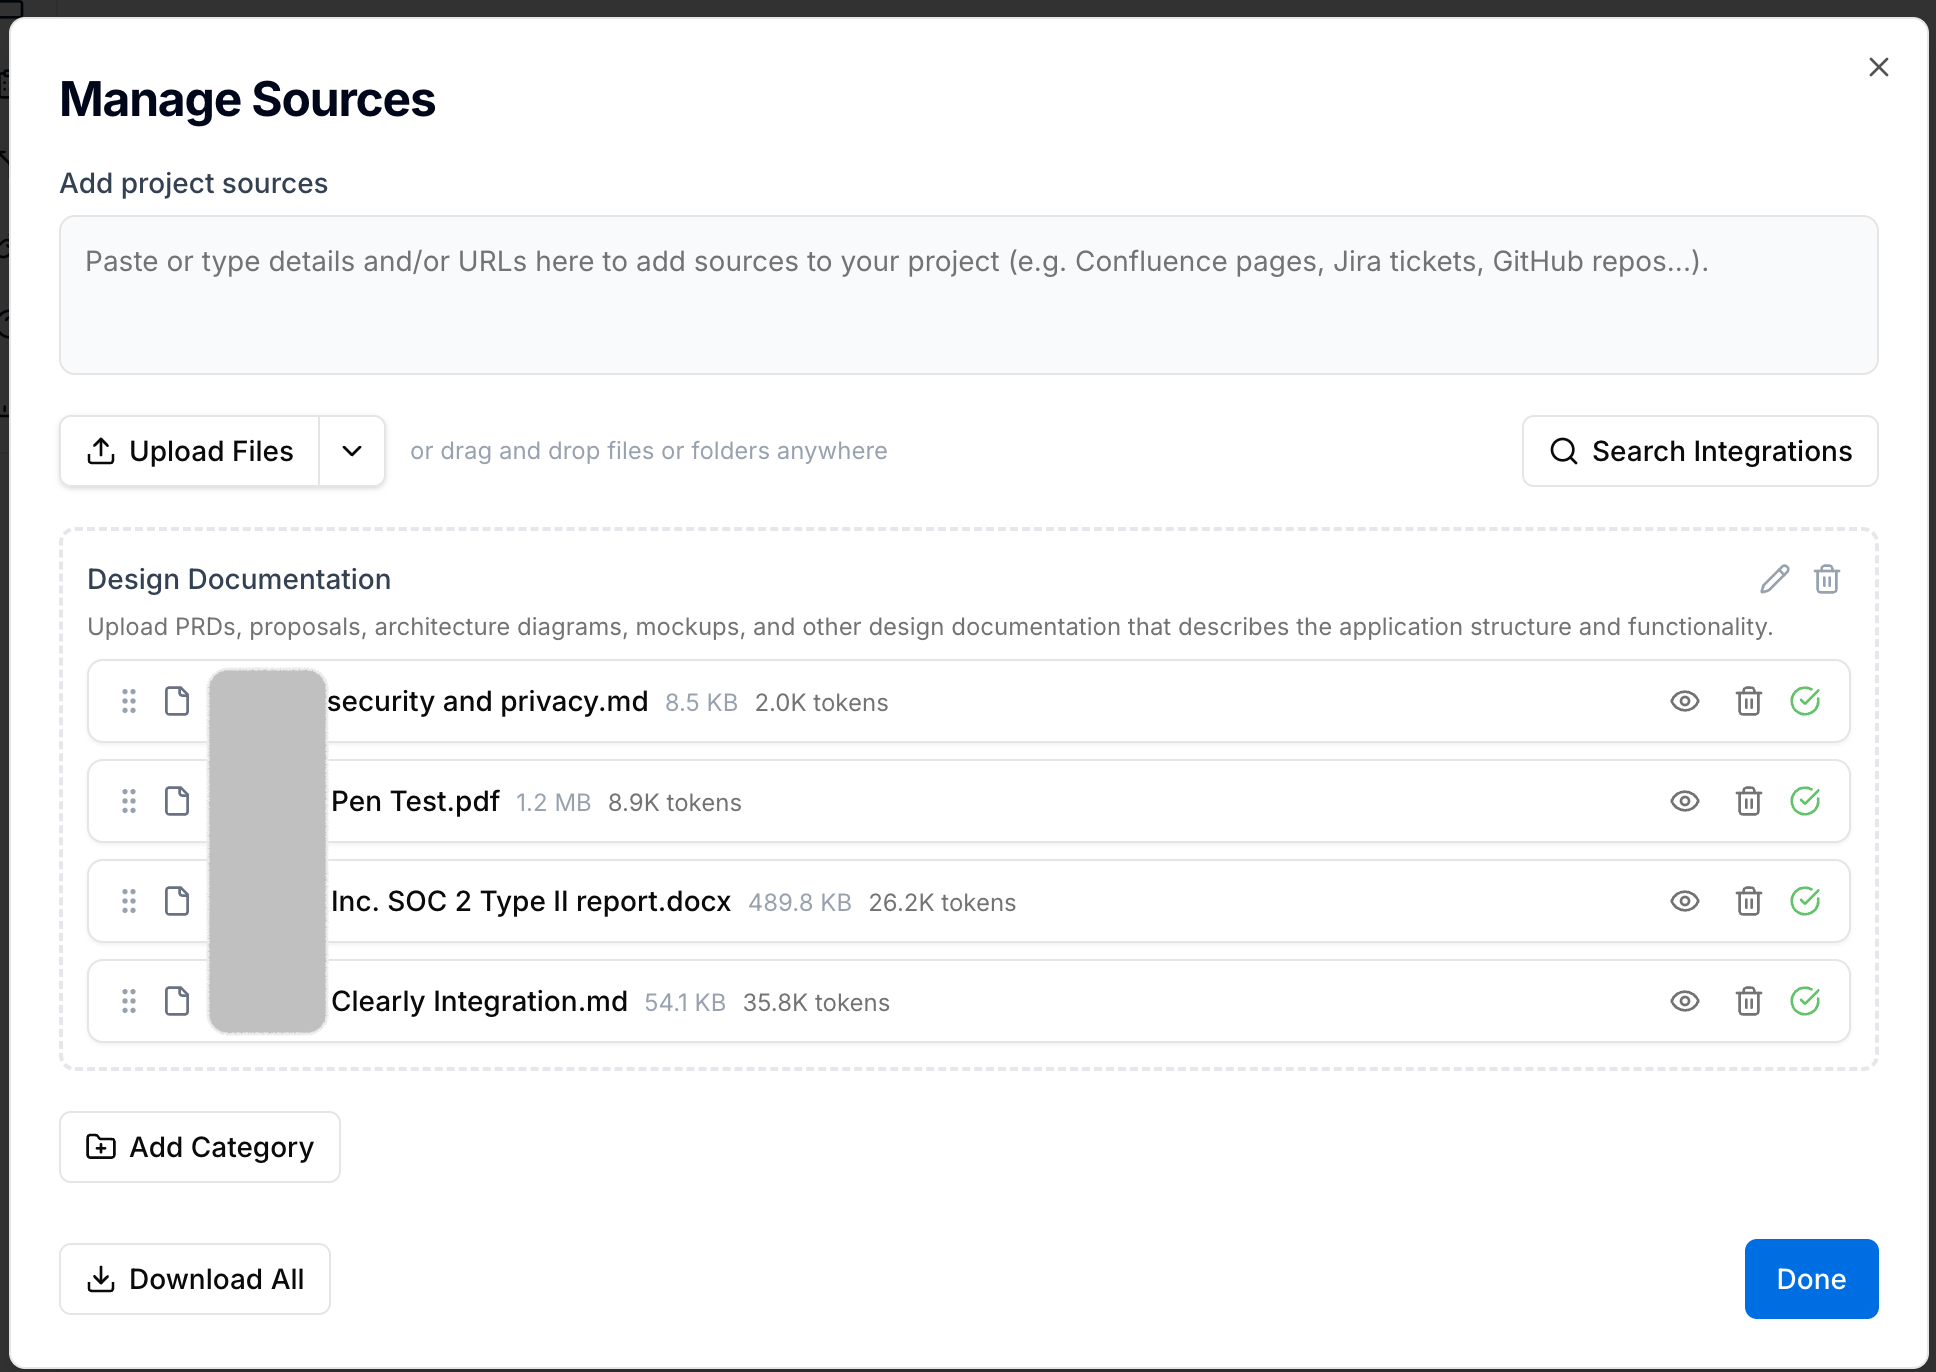
Figure 7. Multiple Categories (for example Design Documentation and Security) with sources grouped under each.
After you add at least one source, New Review becomes available even while ingestion is still running (you may see Processing sources... on the overview). Clearly AI queues the review and starts generation when sources finish processing. When processing completes without errors, the overview shows Sources ready as in Figure 8.
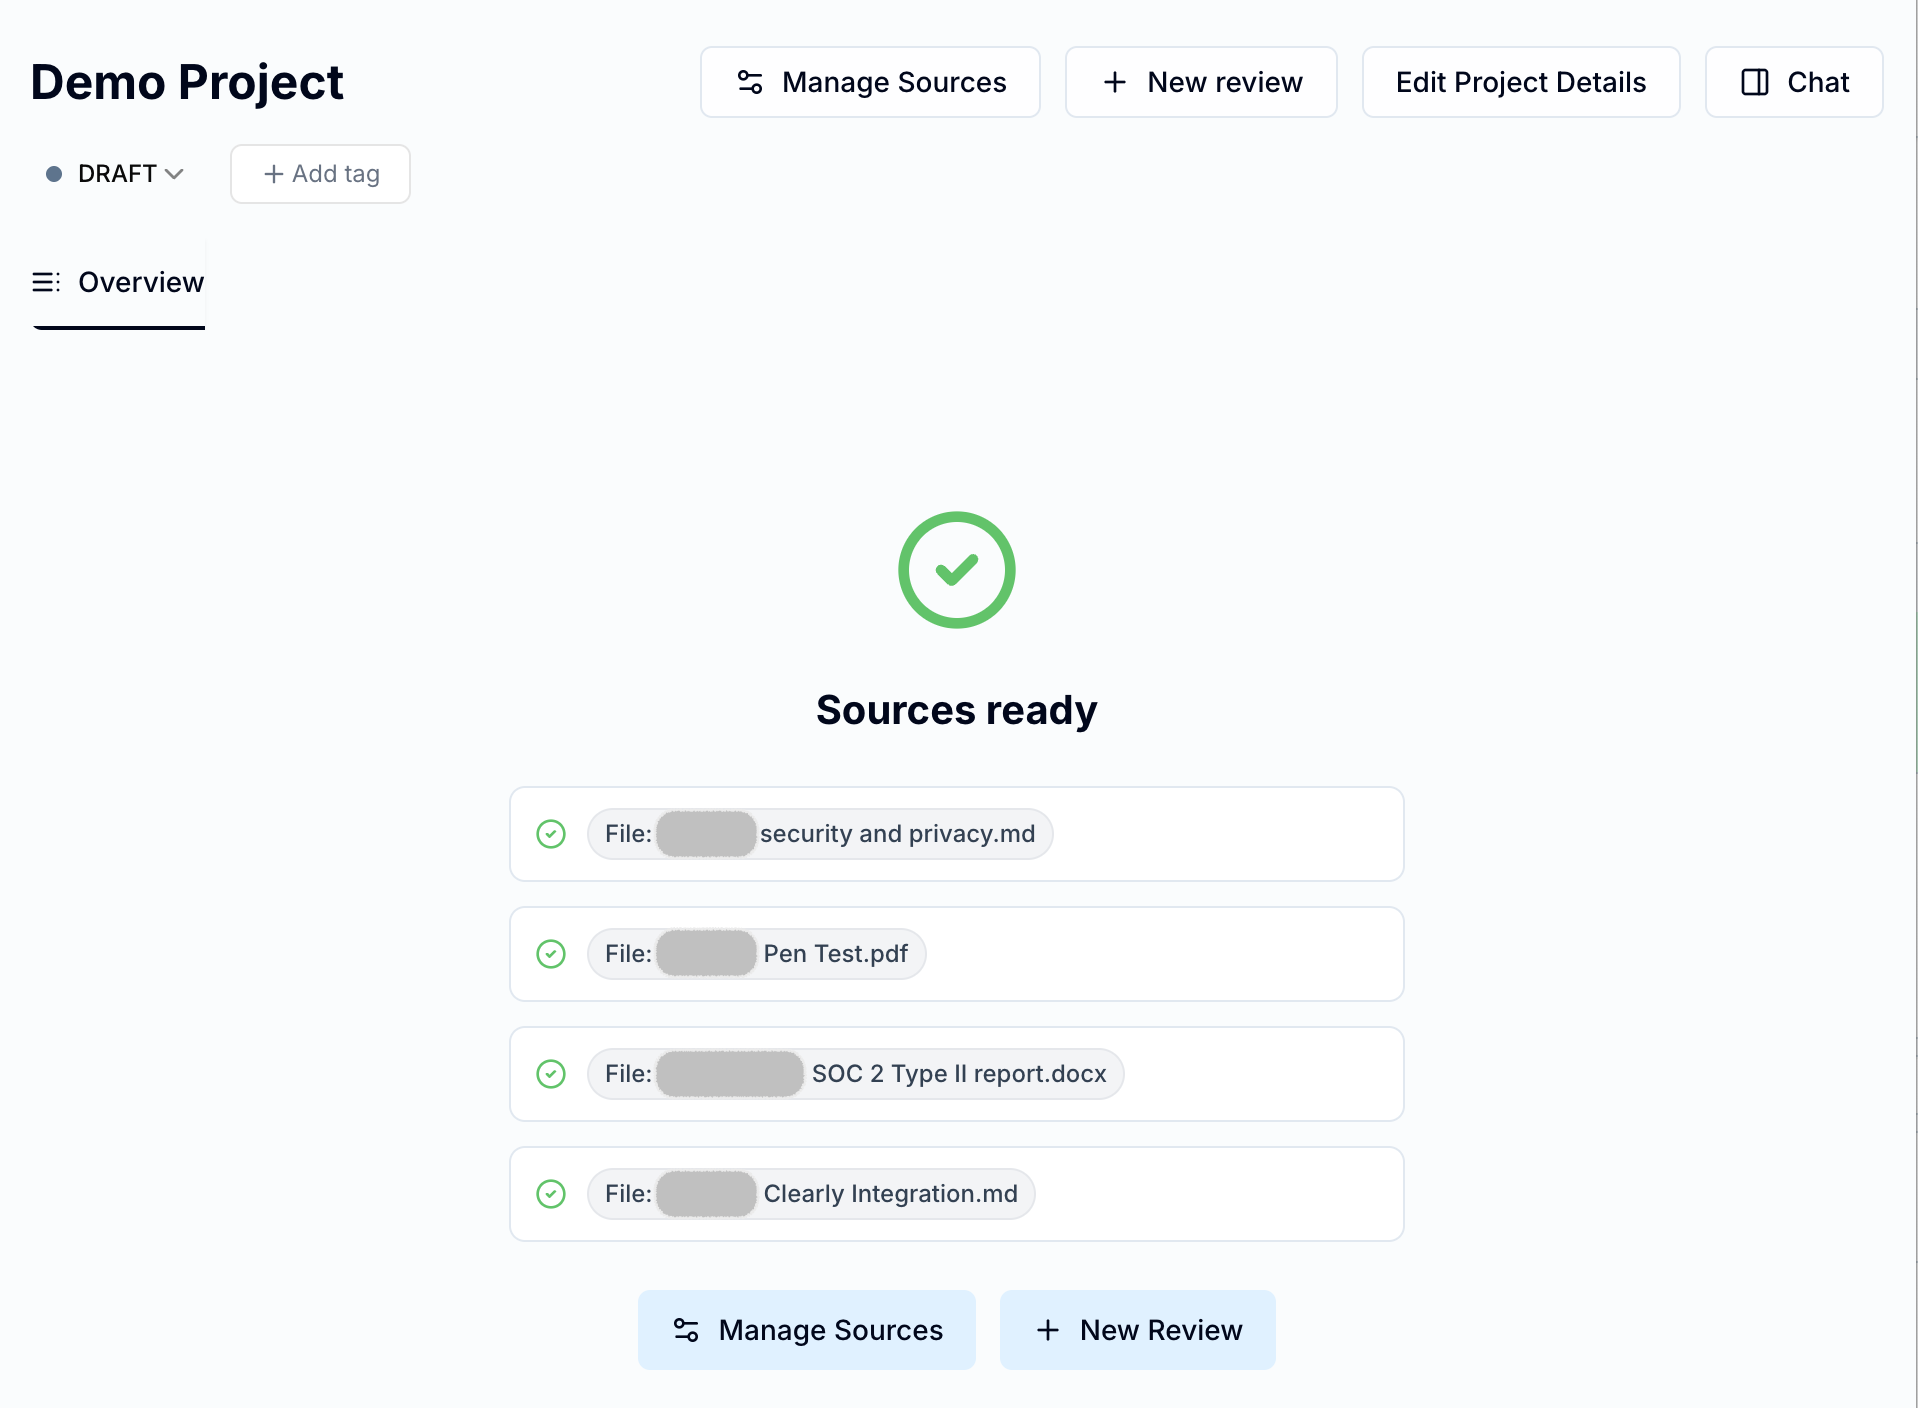
Figure 8. Overview when sources have finished processing: Sources ready. New Review is also available while sources are still processing.
Step 3: Create the review
- On the project overview, click New Review.
- In Create New Review, choose a review template from the list (Figure 9). The right default is usually the one your admin recommends for general use; names and availability depend on your org.
- Optionally expand Add Reviewers if your team uses that.
- Click Create. Generation is enqueued right away. If sources are still processing, the review waits in Review Generation Queued until they finish; there is no separate “Start” button.
This dialog does not ask for a custom review title. What you see in the sidebar and headers comes from the review template name and project, not a name you type here.
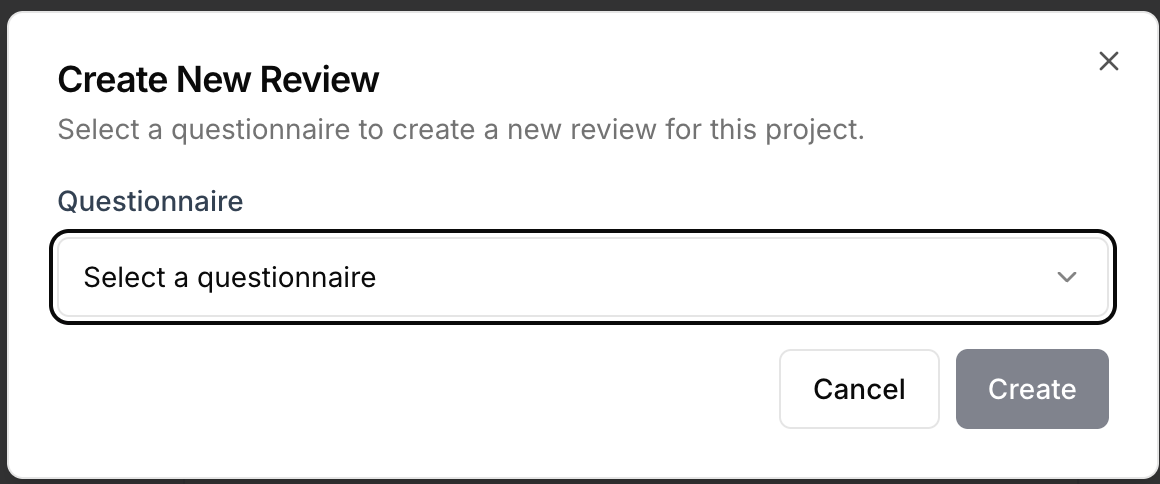
Figure 9. Create New Review: select a Review Template, then Create (and Cancel to close without starting).
Step 4: Wait for results
A status area shows progress while the review is generating. Time varies; you can leave the page and come back. Figure 10 shows the Answering Questions state on the review tab while generation runs.
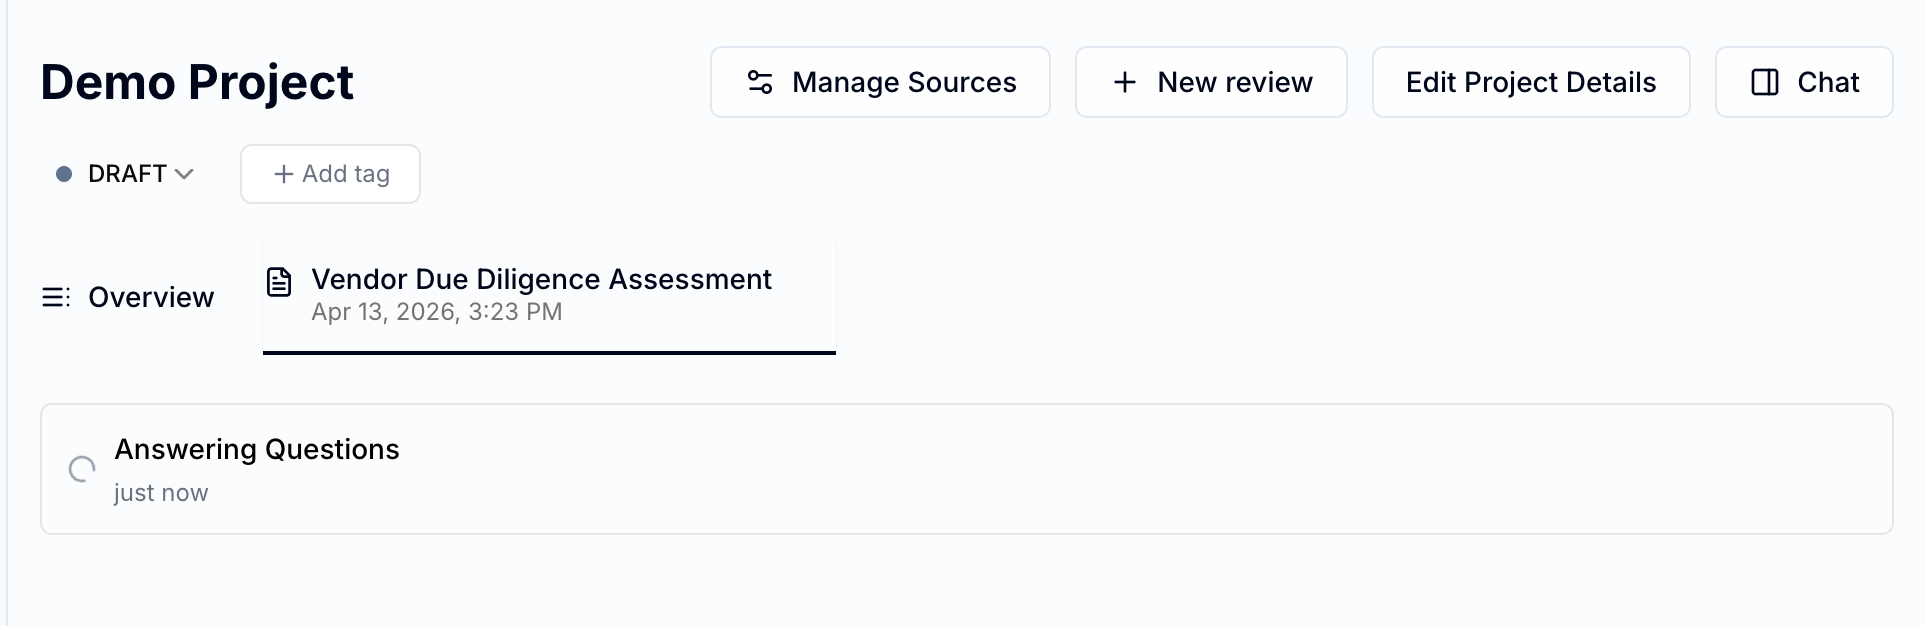
Figure 10. In-progress review: Answering Questions with a spinner on the project review tab.
Step 5: Read the results
Open the review tab. Content is organized by the review template: introductory text, sections, questions, and sometimes summary or risk-style blocks depending on what your review template includes.
Status — Each item is shown as Compliant, Partially compliant, Noncompliant, Out of Scope, or Missing info (when the sources did not support a confident answer). Administrators can rename these status labels for your organization in Settings, so the exact wording may differ. Some questions are informational only, and will not show a compliance status. Row-level icons and section rollups appear as in Figure 11; many review templates also show a header summary with totals (Figure 14).
Analysis and citations — Explanations appear with the answers, often under Notes, with links or references back to places in your sources. Figure 12 shows citation markers inline in the answer body; Figure 13 shows the Notes panel for the same style of generated analysis.
Summaries and risk — Some review templates include an executive-style summary or risk rollup; others focus on control-by-control rows. Both are normal. Figure 11 is an example of a section with several questions and mixed status at a glance.
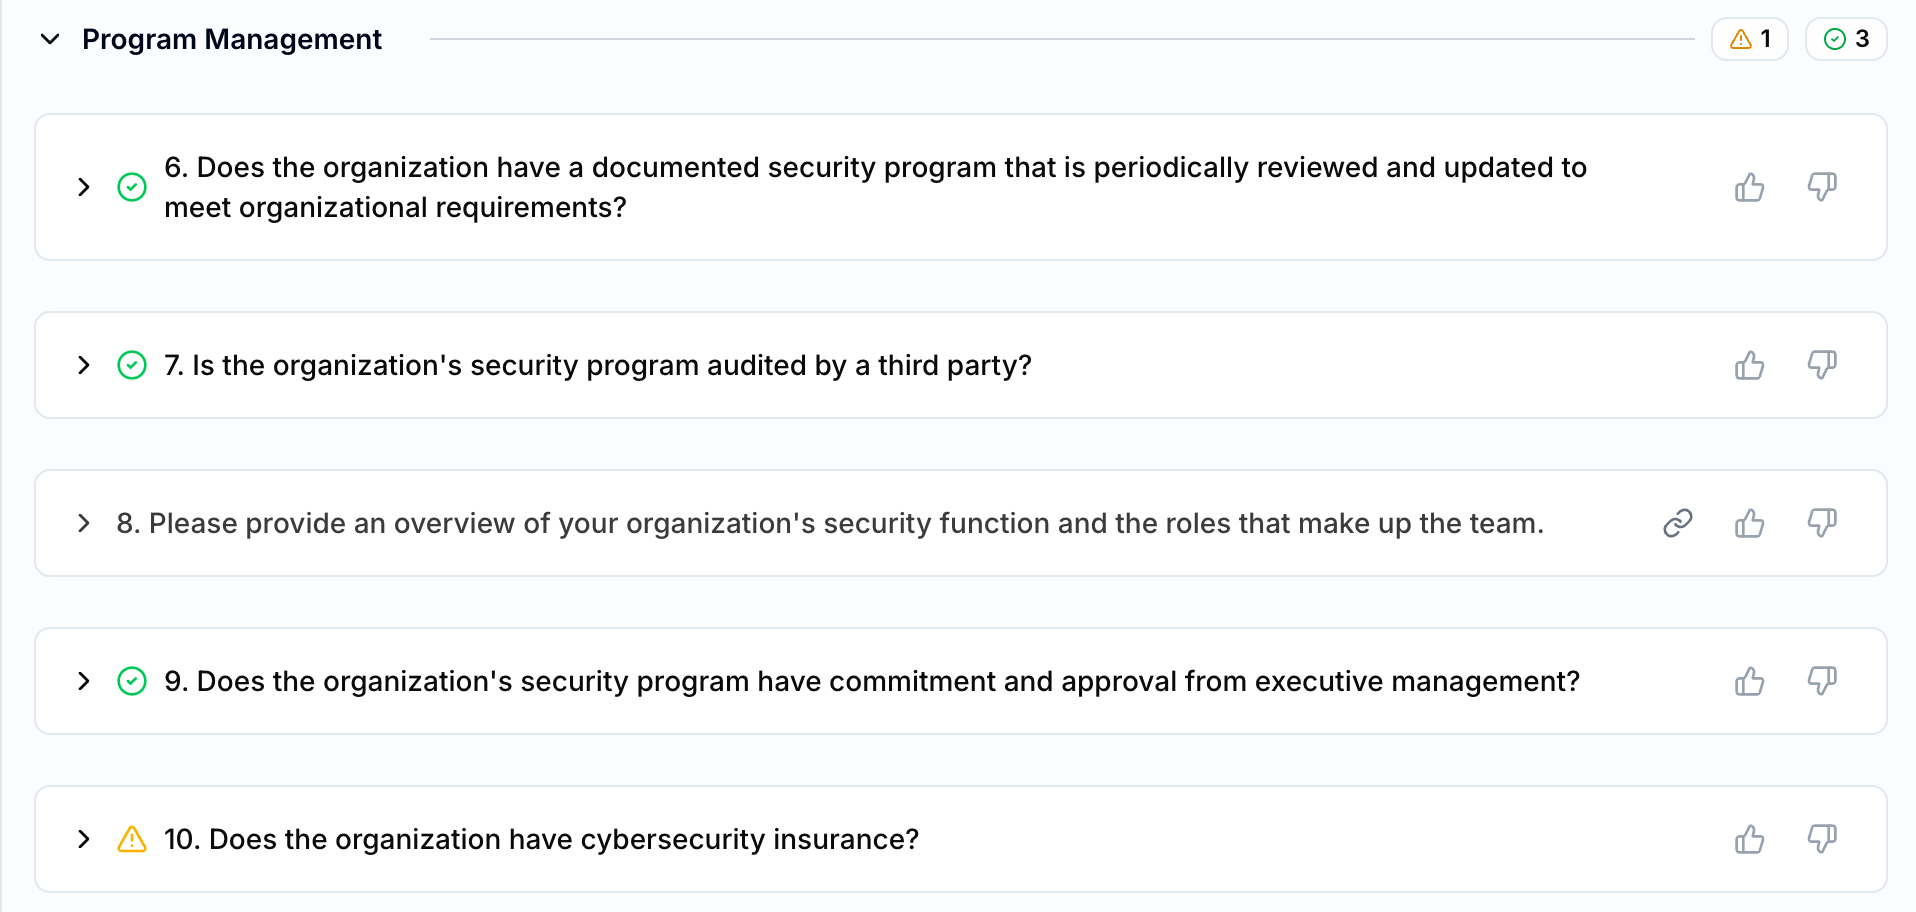
Figure 11. A review template section with numbered questions, status icons on each row, and section-level counts.
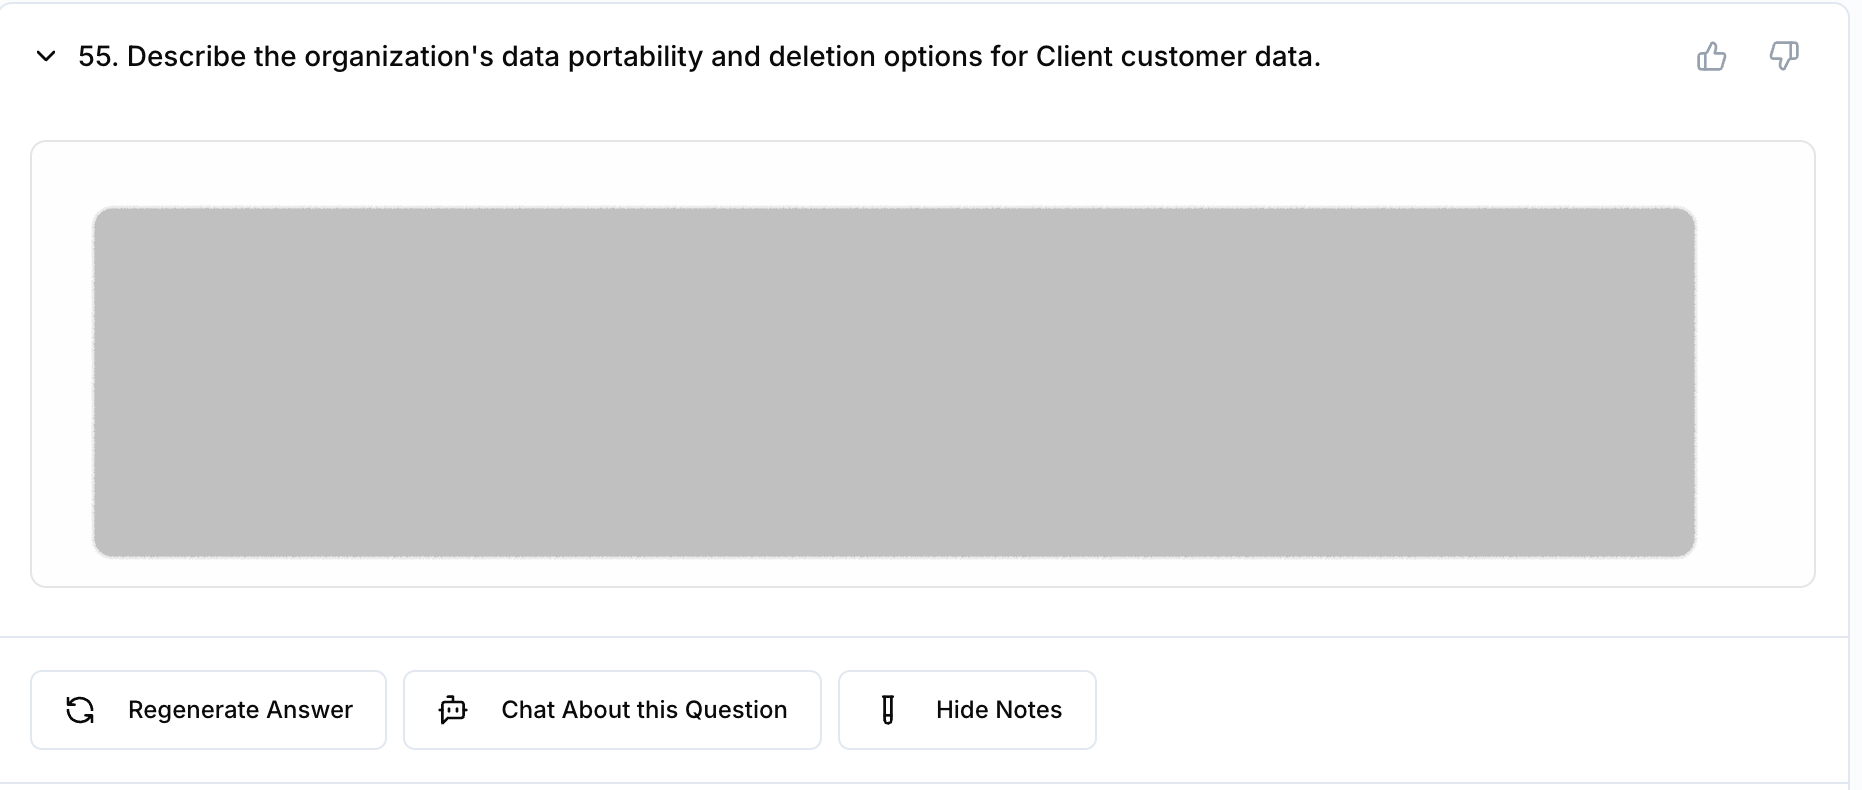
Figure 12. Expanded question: generated Answer text with numbered citation chips in the body.
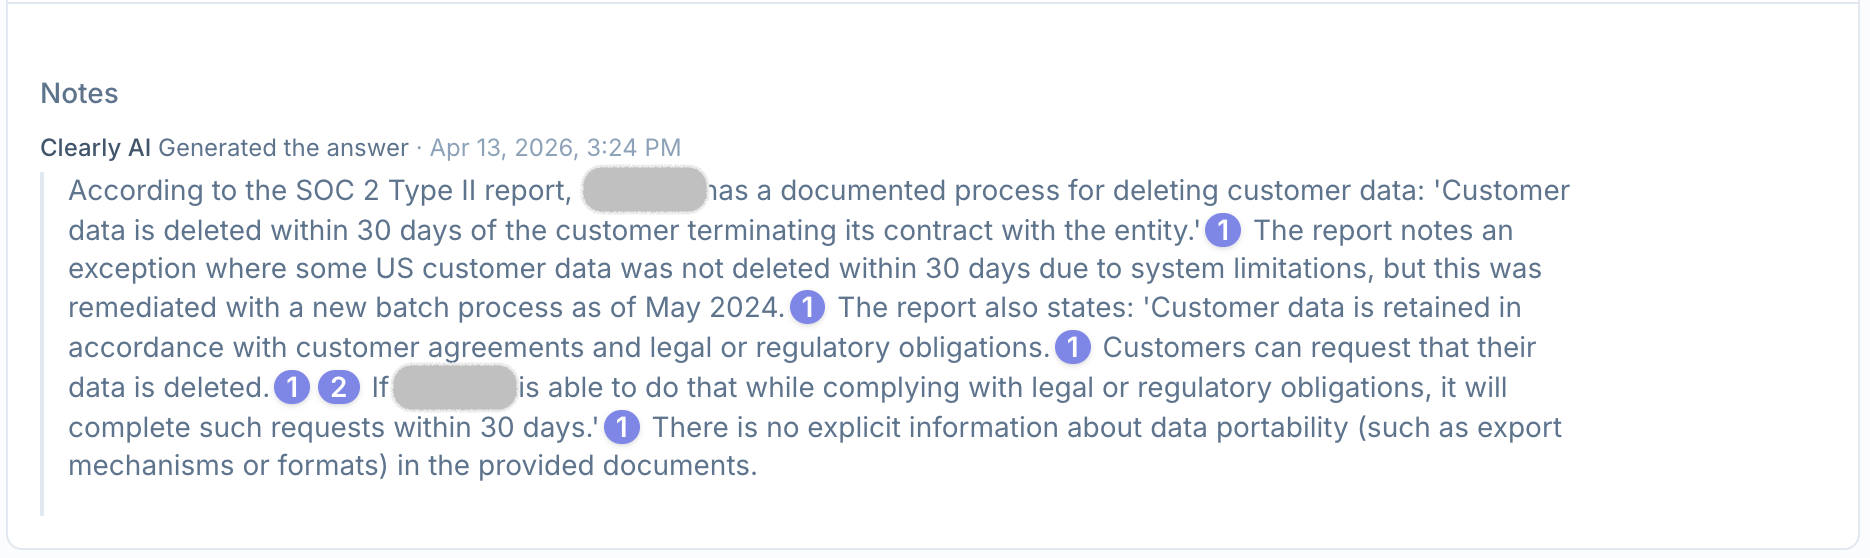
Figure 13. Notes: model-generated explanation with the same citation markers for traceability.

Figure 14. Review header: Total Questions plus summary badges for each outcome type.
Step 6: Give feedback on answer quality
Use the thumbs up and thumbs down controls on an answer to tell Clearly AI whether the result was useful. You can add a short note with the feedback.
Thumbs feedback is reviewed by the Clearly AI team. A thumbs down is a signal that the answer may need investigation, tuning, or product work. We use the linked review context, citations, source material, and your note to decide what kind of follow-up is needed.
Feedback can include customer data
Submitting feedback allows authorized Clearly AI personnel to inspect the answer and the minimum supporting context needed to investigate it. Do not add sensitive information to the note unless it is necessary for the investigation. Employee access is limited and logged as described in Security and privacy.
Common outcomes include:
- Question or prompt tuning: We help improve the review template instructions behind the answer, such as making a broad question more precise, adding a rubric, or clarifying which sources to use.
- Context or retrieval investigation: If the right source was missed or the answer did not cite the evidence you expected, we investigate how Clearly AI selected and used context.
- Product follow-up: If the feedback points to a broader workflow gap, we triage it as a product request or bug instead of treating it as a review template change.
We usually triage feedback on the order of a business day. Some fixes can be tested quickly by regenerating an answer or running an updated review template version against the same project. Broader product or retrieval changes may take longer.
Feedback does not immediately rewrite the answer or train a model in place. It gives Clearly AI a concrete example to inspect and use in the improvement loop. The most helpful notes say what was wrong, what answer you expected, and which source or policy supports that expectation.
Step 7: Edit or adjust answers
- For many question types you can edit the answer text (or choices) and save your changes; Figure 15 shows a representative rich-text answer in edit mode.
- For some non-compliant results, a small pencil icon lets you adjust compliance when your process allows it (Figure 16).
- The analysis text is not always editable like a free-form field; treat the main editable surface as the answer where the app offers save or edit controls.
Regenerate runs the automated review again. Treat manual edits as something to re-check after regeneration, since a new run may refresh model-generated content.
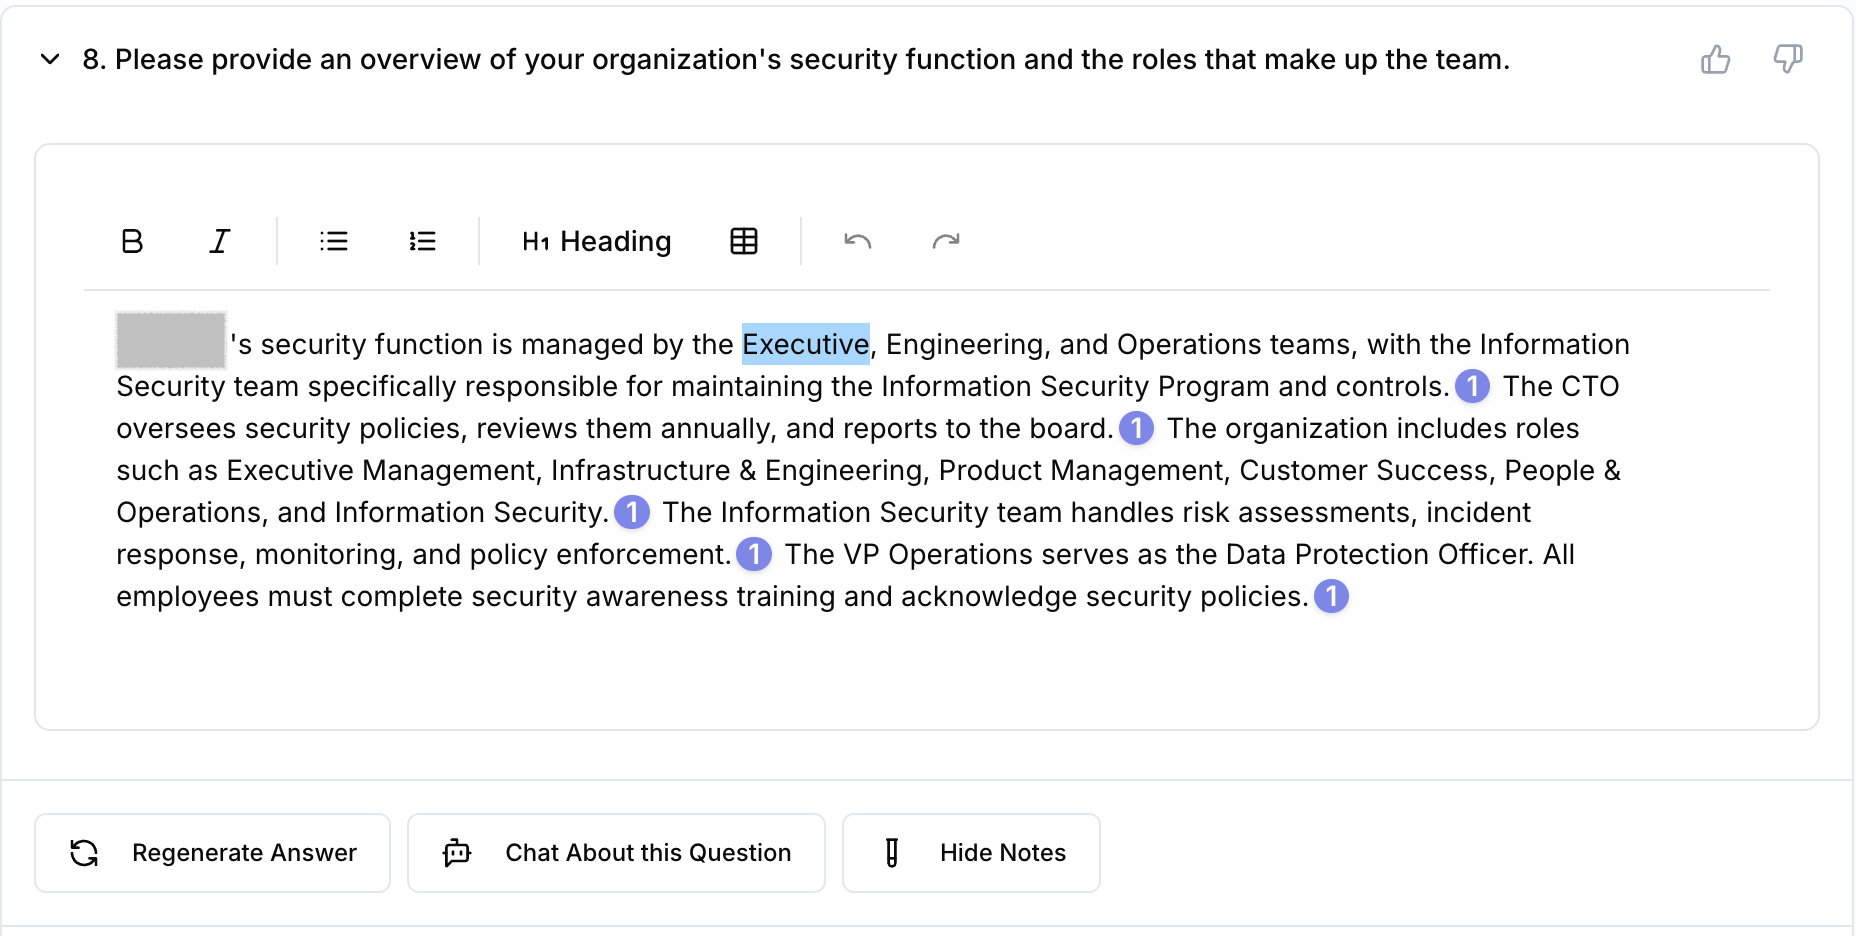
Figure 15. Edit mode on a freeform-style answer: toolbar, citations, and actions such as Regenerate Answer.
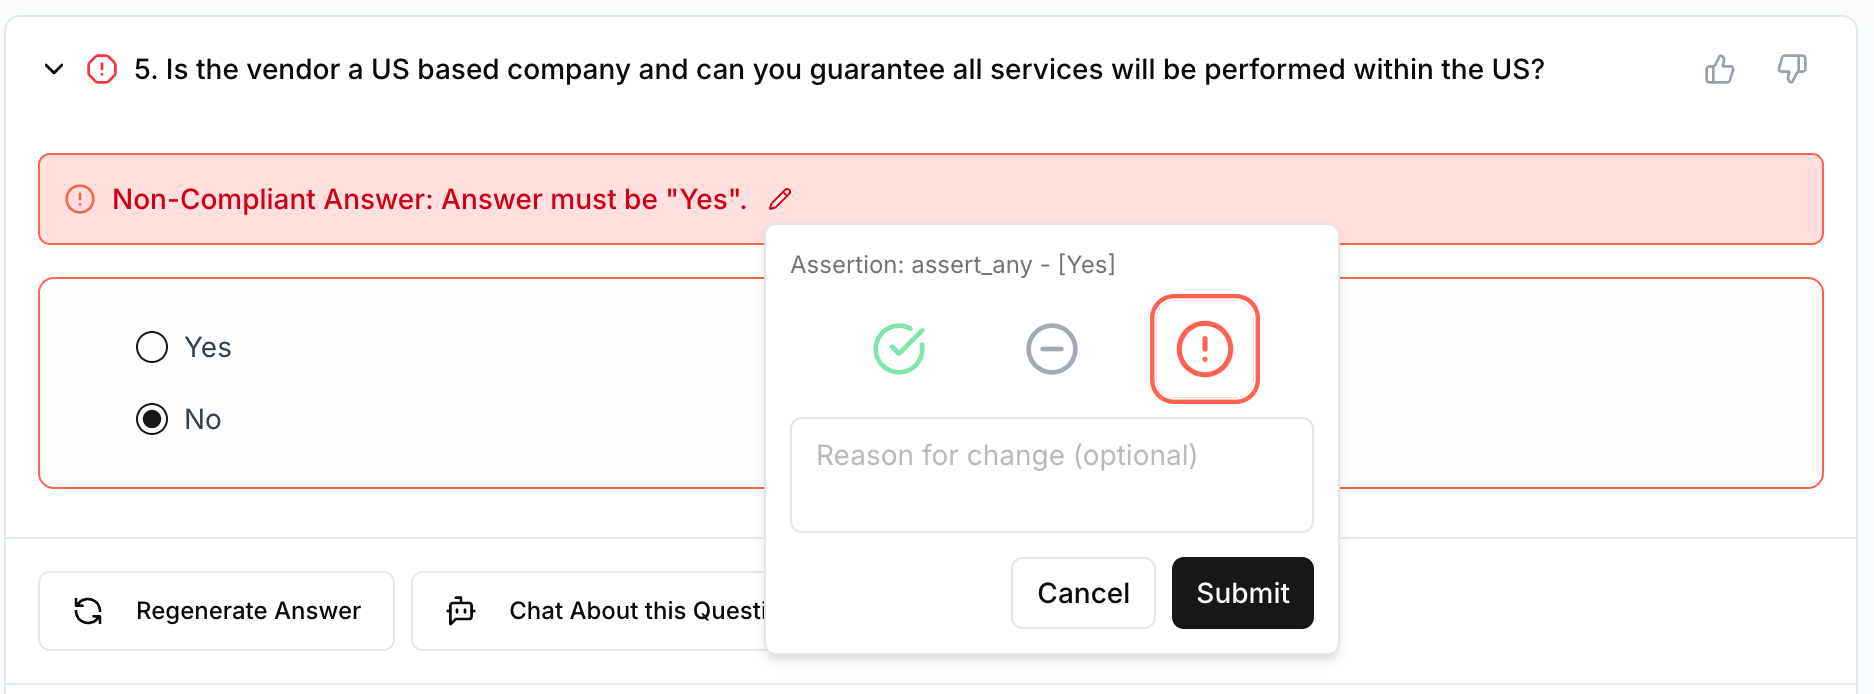
Figure 16. Non-Compliant banner with pencil, and the Assertion popover to set pass / neutral / fail and an optional reason.
Step 8: Export and links
Use the Export control on the review screen (near Regenerate and the expand options). You can download Markdown, HTML, PDF, or Word, and sometimes CSV or Excel when your review template enables those. See Figure 17 for an example
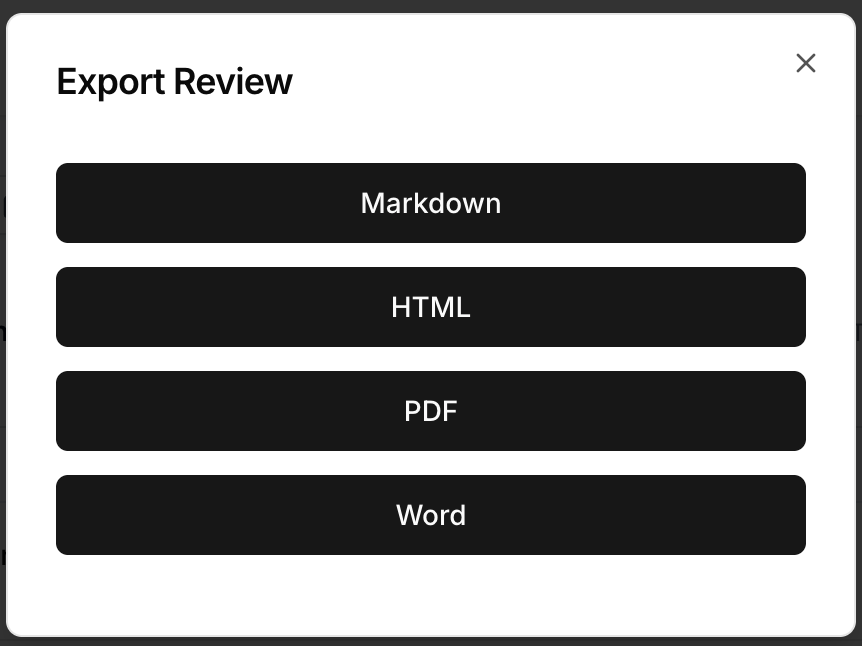
Figure 17. Data export dialog.